

TVs are a mainstay in many households. They tend to dominate living rooms, reigning over the sitting area. Although this is an ideal set up for movie night, they are an eyesore the rest of the time. You may be trying for a cozy and sophisticated space but that large black rectangle is clashing with the rest of the decor. You don’t have to ignore it; turn the TV into a piece of art by constructing an aesthetically-pleasing frame.
The beginning of the DIY TV frame trend
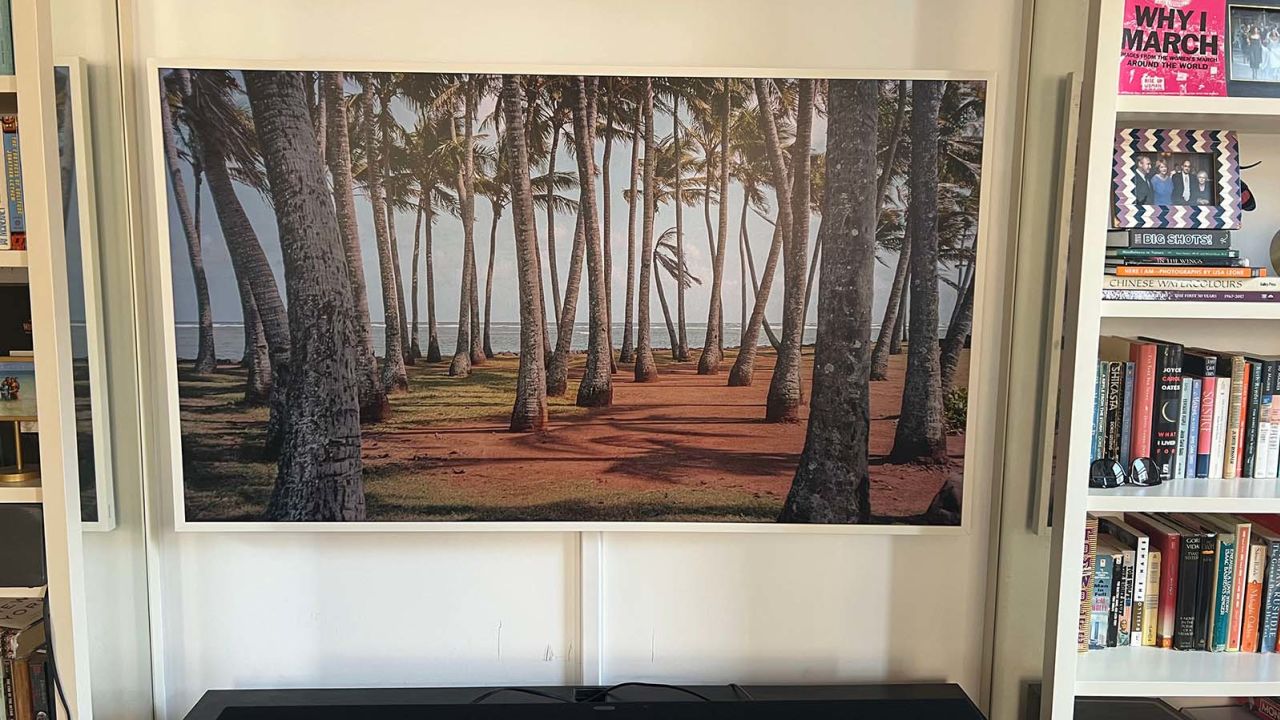
Samsung released a version of TV sets that look like paintings when they’re not in use. You can choose the picture and let it blend into the rest of the home’s decor. However, the TV is expensive and many people are happy with their current setup anyway. So influencers took to TikTok and their blogs to show off their own DIY TV frames, and how they transformed their living rooms.
How to make a DIY TV Frame

Supplies:
- Molding
- Miter saw
- 90-degree angle clamp
- Epoxy or wood glue
- Paint
- Paint finish
- Nail gun
- Two 3-inch pieces of 1×2 pine
Step one: Choose the molding

Before you begin, notice if your TV is hung or on a console, and account for the aesthetic of your room. This will help you decide on the size of the frame, the pattern of the molding, and the color of the paint. Next, measure the dimensions of your TV and ensure the frame won’t block any of the screen. Now add about four inches to the end of each measurement to make room for the necessary angled cuts. Be sure to bring these numbers when you go shopping for your materials.
Step two: Set up the TV frame
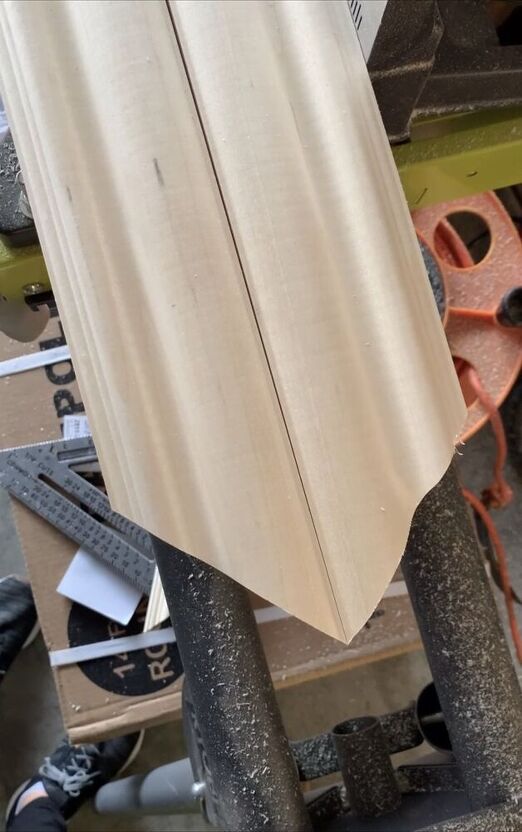
Use the miter saw to cut the trim to the proper size but be careful since the pieces need to mirror each other perfectly. Next, make angled cuts on each end of the four moldings. Be sure to angle the cuts outward and not inward so they can fit together like a frame.
Step three: Assemble the frame

Set up the frame, with a tarp or garbage bags underneath to protect the surface its on. Place two angled edges into the 90-degree angle clamp and tighten it. Loosen one side to apply the epoxy or glue then quickly tighten the clamp again. This method can help prevent hasty and messy adjustments. Let the clamp sit for an hour to set before taking it off and glueing the other three corners.
Once this is done, you can reinforce the corners with a nail gun.
Step four: Painting

Many creators showed off their own distinct DIY TV frames, designed specially to suit their homes. Therefore, there are different ways one can decorate their own frame. On her blog, Cassmakeshome spray painted hers black. Then she taped part of it and painted the rest gold to create a vintage-looking black and gold frame. Meanwhile, JennaSueDesign skipped the paint, and used wood stain then wood finish.
Whichever design you pick, let the paint dry before applying a paint finish
Step five: Hanging

Mark the top center of the frame, then mark the center of one of the small 1×2 wood pieces. Then position the two pieces into an L shape that could fit over the top of the TV like a hanger. Attach the two pieces together with the nail gun, but do one more measurement before attaching the bracket to the frame. Measure the top of the TV so you can position the hanger to cover the corners of the screen but not too high or low. Ensure the nails are long enough to connect the wood piece and the frame, but not long enough to appear at the wrong side of the frame.
Step six: Display art
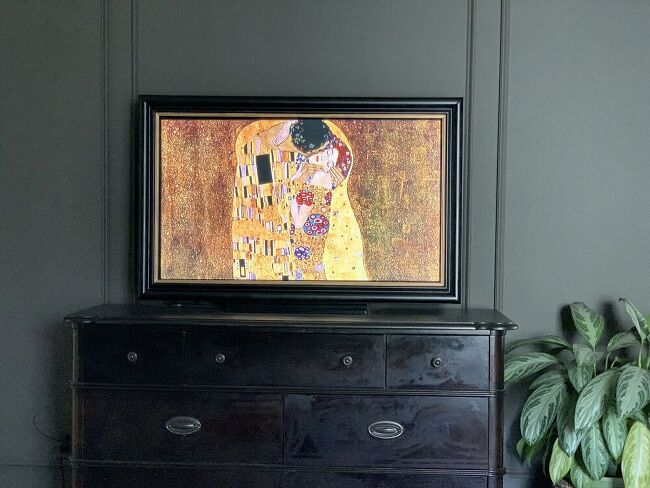
Once the bracket is complete, hang the frame over the TV and turn it on to show off your art. You can use Amazon photos for a display on a smart TV, or you can use apps like ArtCast, or devices like Fire Sticks or Rokus. You can even turn on YouTube and find your favorite slideshow. Keep in mind that the TV needs to be on for this to work, so you may need to be cautious of screen burn from displaying one image for a long period of time, suggests Better Homes and Gardens.
Read More: 12 Mistakes To Avoid When Designing Your Bedroom